3D. Classrooms/conference rooms with passive IR detectors
Single premises with two lighting groups, automatic lighting control and manual dimming
| Premises
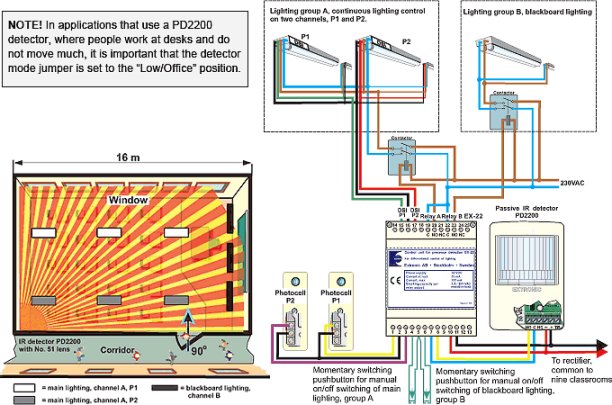
In classrooms (or conference rooms) it is important to get across the right message. Students should not learn that lighting is switched on and off automatically. Teach them instead to turn on lighting when necessary (classrooms usually have natural light from windows) and to turn it off afterwards. It should also be possible to switch off or dim the lighting in order to watch a film, etc. In classrooms and conference rooms an IR detector is used with 51 lens. This gives the highest possible resolution and hence the ability to detect small movements. Light sources The light fittings in lighting group A have dimmable HF ballasts with digital control that complies with the DSI standard. For blackboard illumination, group B, light fittings with 50 Hz coil ballast or non-dimmable HF ballast can be used. Placement of detector Placement of the detector is critical to operation! The diagram below illustrates how the detector should be placed. In combination with a 51 lens, which permits higher positioning, this gives optimum detection when people enter. In addition the detector cannot see out through the door, so the lighting does not stay on as a result of people walking past in the corridor outside. The placement of the detector in the corner that is furthest from the door allows the detector to be installed higher up, which reduces the risk of damage. By mounting it in this position the slightly downward-tilted beam reaches the area by the door at a suitable height. By sliding the circuit board in the detector upwards the detection zone can be raised. Information for current budget
|
Control system
To exploit the hidden savings potential available in all areas that have natural lighting, the installation should include an on/off logic module that prevents the lighting from being switched on when someone enters. Some activities may not require more lighting than the available natural light, so personal needs should decide when lighting is switched on. This means that lighting groups A and B are switched on and off in the usual way using pushbuttons. The detector only comes into action and switches the lighting off when someone has forgotten to do so. EX-22 has two inputs for presence detectors. The light fittings in group A are controlled digitally according to the DSI standard. Two DSI channels (P1 and P2) are used to control the light fittings in two separate lighting groups via bus cables. This allows better compensation for incoming natural lights from windows/skylights, and saves more energy. The digital lighting control uses two light sensors to give individual control of two digital channels, P1 and P2. See the wiring diagram below. The light fittings on channel P1, which are closest to the windows, are controlled so that they produce less light than the light fittings on channel P2, which are located further from the windows where there is less natural light. The light intensity can also be controlled manually by holding in the pushbutton for channel A. Whenever the lights are switched on again the system reverts to the set lighting levels for continuous lighting control.
|
||||||||||||||||||
 |
|||||||||||||||||||
|
Light level produced by light fittings controlled by channels P1 and P2 under different ambient light conditions. |
|||||||||||||||||||
|
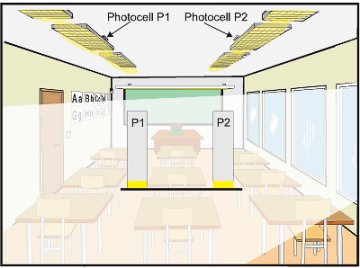
When sun is low it provides a lot of natural light in the entire classroom. The light fittings on both channels have a low output. |
 |
||||||||||||||||||
|
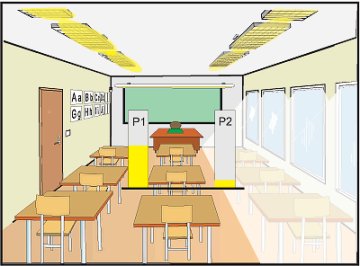
When the sun is high it provides a lot of natural light close to the windows, but less further into the classroom. The light fittings on channel P1 have a high output, while those on channel P2 have a low output. |
 |
||||||||||||||||||
|
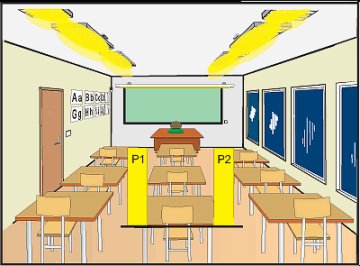
When it is dark outside the light fittings on both channels have a high output. |
 |
||||||||||||||||||